In this lesson we explore another device, programmable colored LED lights, integrated in the robot car. We will also introduce the concept of "FUNCTIONS" in programming and how to do it via the MakeCode program editor.

List of Materials
- DFROBOT MAQUEEN
- Micro USB Cable
- 3 AAA Battery
- Laptop or PC to access Microbit Makecode Visual Programming IDE
Learning Goals
- Learn how to access and control the NeoPixel RGB Light Strip
- Learn how to produce different colors of light by adjusting the brightness of each color component: RED, GREEN, BLUE of the RGB Light
- Learn how to import and reuse Projects by loading *.hex files
- Learn how to create and group repetitive codes into a function
- Learn how to display a number on the 5x5 LED matrix of Micro:bit
- Learn how to use the Makecode editor simulator
NeoPixel RGB Light Strip
The Maqueen robot car has 4 on-board RGB LED lights under its circuit board that can be programmed to take on different colors. RGB is an acronym for RED - GREEN - BLUE, the color components that control the output color of the LED light.The image below is from DFRobot Maqueen Wiki.

The 4 RGB LED lights are connected to the Micro:bit controller board via the output pin P15.
The images used below are from BBC micro:bit MicroPython documentation and from components101.com.

In order to control or program the RGB Light Strip we need to assign it to a variable at the beginning of the program.

During program runtime, the RGB Light variable will be assigned with the appropriate brightness for each component color: red, green, and blue.

Each color component can be programmed with a value from 0 to 255 that represents the amount of brightness or intensity of the color. Zero represents that the color component is OFF and 255 represents the maximum brightness of the color component.
At the end of every lesson the student should fill-up the appropriate output color in the table below (The FREE printable at the end of the post contains a copy of this table):

LESSON 1: Generating Colored Light
The detailed tasks of this lesson are detailed in the FREE printable that can be downloaded at the end of the post. I will just give a summary of the lesson in this post.I've also prepared a video which beginner students can follow instead of writing the program on their own. You can access the video here.
In LESSON 1, the student is tasked to write a program that will switch between OFF, BLUE, GREEN, and RED colored light when BUTTON B is pressed.
The following variables need to be created and initialized at the start of the program: CURRENT_COLOR, RED, GREEN, BLUE, and RGB_LIGHT.
RGB_LIGHT is a special variable that needs to be associated with the RGB Light strip device on board the robot car.
LESSON 2: Creating Functions
Similar to LESSON 1, the detailed tasks of this lesson are detailed in the FREE printable that can be downloaded at the end of the post and I will just give a summary of the lesson in this post.The main goal of this lesson is to introduce the concept of functions and how to implement them in the Makecode block programming editor. This lesson also touches on the method of reusing or importing previously created projects. Finally, it introduces the simulator embedded in the Makecode editor. The lesson starts by instructing the student to import the project (
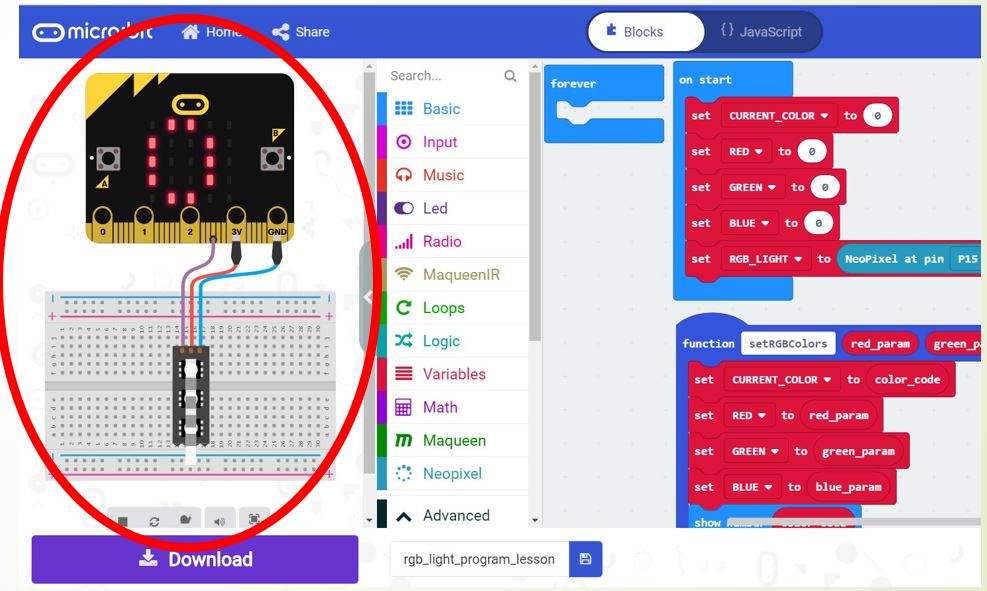
The next part of the lesson introduces the simulator (LEFT SIDE OF THE MAKECODE EDITOR) embedded in the MakeCode editor.

The last part of LESSON 2 instructs the student to group the repetitive code created in LESSON 1 into a function. Please see the video here for an example on how to go about this part of the lesson.

0 comments:
Post a Comment
Thanks for dropping by my blog! It really means a lot that you spare the time to read... and comment! Don't forget to check the "Notify Me" box so you will be notified of my response.